Are Spring Rolls Really That Hard to Make?
Have you ever bitten into a crispy, golden spring roll and thought, “Wow, I could never make this at home”? Think again! What if I told you that making the perfect vegetable spring rolls is easier than you think—and you can do it in just 7 simple steps? Many people believe spring rolls are tricky to make, but I’m here to show you how fun, fast, and foolproof they can be. Curious? Keep reading to discover how to whip up a batch of delicious, healthy vegetable spring rolls that will impress your family and friends!
Overview : Why This Vegetable Spring Rolls Recipe Is Special
This vegetable spring rolls recipe is a game-changer! It’s packed with fresh, colorful veggies, wrapped in crispy spring roll wrappers, and baked (not fried!) for a healthier twist. Here’s why you’ll love it:
- Time Requirement: Ready in just 40 minutes—perfect for busy weeknights or quick snacks.
- Difficulty Level: Super easy, even if you’re new to cooking. No fancy skills needed!
- Special Features: This recipe is versatile (you can swap ingredients), healthy (low in oil), and kid-friendly (everyone loves a crispy roll!). Plus, it’s a great way to sneak in more veggies.
Whether you’re hosting a party, packing a lunch, or craving a light dinner, these spring rolls are your go-to solution. Let’s dive in!
Essential Ingredients : What You’ll Need
Here’s what makes these vegetable spring rolls so tasty and crunchy. Each ingredient plays a special role, but don’t worry—there are easy swaps if you’re missing something!
Key Ingredients:
- Spring Roll Wrappers (8-10 sheets): These thin sheets are the secret to that crispy crunch. Find them in the freezer section of most grocery stores.
- Shredded Cabbage (1 cup): Adds a sweet, crunchy bite. Cabbage is full of fiber, which is great for your tummy.
- Shredded Carrots (½ cup): Brings color and a hint of sweetness. Carrots are packed with vitamins for healthy eyes.
- Thinly Sliced Bell Peppers (½ cup): Use red, yellow, or green for a pop of color and crunch. Bell peppers are rich in antioxidants.
- Bean Sprouts (½ cup): Gives a fresh, juicy texture. These are full of protein and vitamins.
- Green Onions (2 tablespoons, chopped): Adds a mild, zesty flavor.
- Soy Sauce (1 tablespoon): Brings a savory, umami taste. Use low-sodium if you prefer.
- Olive Oil (1 tablespoon): For brushing the rolls before baking—keeps them crispy without frying.
Substitutions and Variations:
- No Spring Roll Wrappers? Use rice paper for a softer, gluten-free option (great for fresh spring rolls).
- No Cabbage? Swap with shredded lettuce or kale.
- No Bean Sprouts? Try thinly sliced mushrooms or zucchini.
- Want More Protein? Add shredded tofu or cooked chicken to the filling.
These ingredients are not only delicious but also super healthy, making this recipe a win for your taste buds and your body!
Step-by-Step Instructions : How to Prepare Your Spring Rolls
Let’s make these spring rolls step by step. Don’t worry—I’ll share tips to make it easy and fun!
Step 1 : Preheat Your Oven
- Set your oven to 400°F (200°C). This gets it nice and hot so your spring rolls bake up crispy.
- Tip: Line a baking sheet with parchment paper to prevent sticking and make cleanup a breeze.
Step 2 : Prepare the Veggies
- Wash all your veggies under cold water.
- Shred the cabbage and carrots using a grater or food processor.
- Slice the bell peppers into thin strips.
- Chop the green onions into small pieces.
- Tip: Use a sharp knife or kitchen scissors to make slicing faster and safer.
Step 3 : Mix the Filling
- In a big bowl, toss together the cabbage, carrots, bell peppers, bean sprouts, and green onions.
- Add the soy sauce and mix well. This gives the filling a yummy flavor.
- Tip: Don’t overmix—keep the veggies crunchy for the best texture.
Step 4 : Soften the Spring Roll Wrappers
- Fill a shallow dish with warm water.
- Dip one spring roll wrapper into the water for 10 seconds until it’s soft but not too soggy.
- Lay the wrapper flat on a clean surface, like a cutting board.
- Tip: Work with one wrapper at a time to prevent them from sticking together.
Step 5 : Fill and Roll (See Assembly Section Below)
- Follow the assembly steps to fill and roll your spring rolls.
Step 6 : Bake the Spring Rolls
- Place the rolled spring rolls on your baking sheet, seam side down.
- Brush each roll lightly with olive oil to help them turn golden and crispy.
- Bake for 20-25 minutes, flipping them halfway through, until they’re golden brown.
- Tip: Keep an eye on them during the last few minutes to avoid burning.
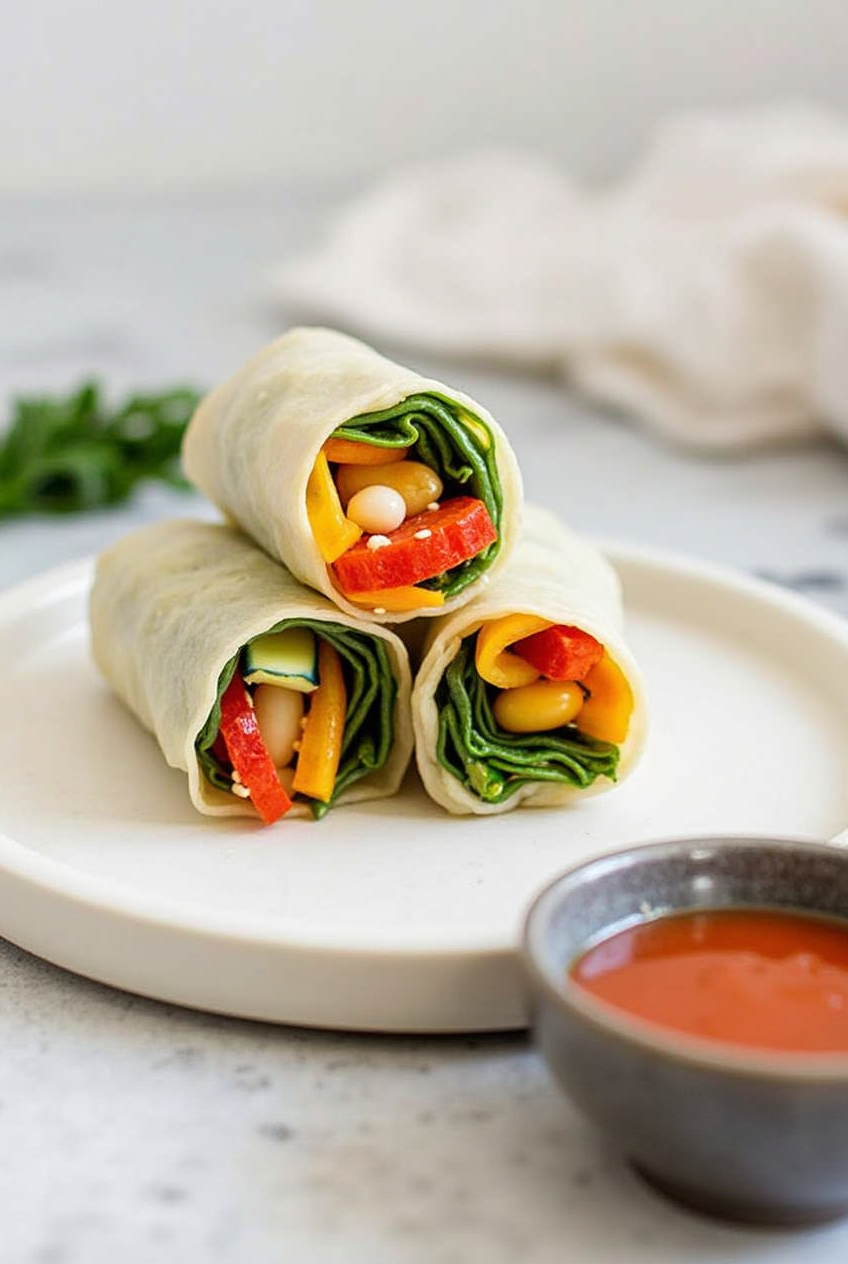
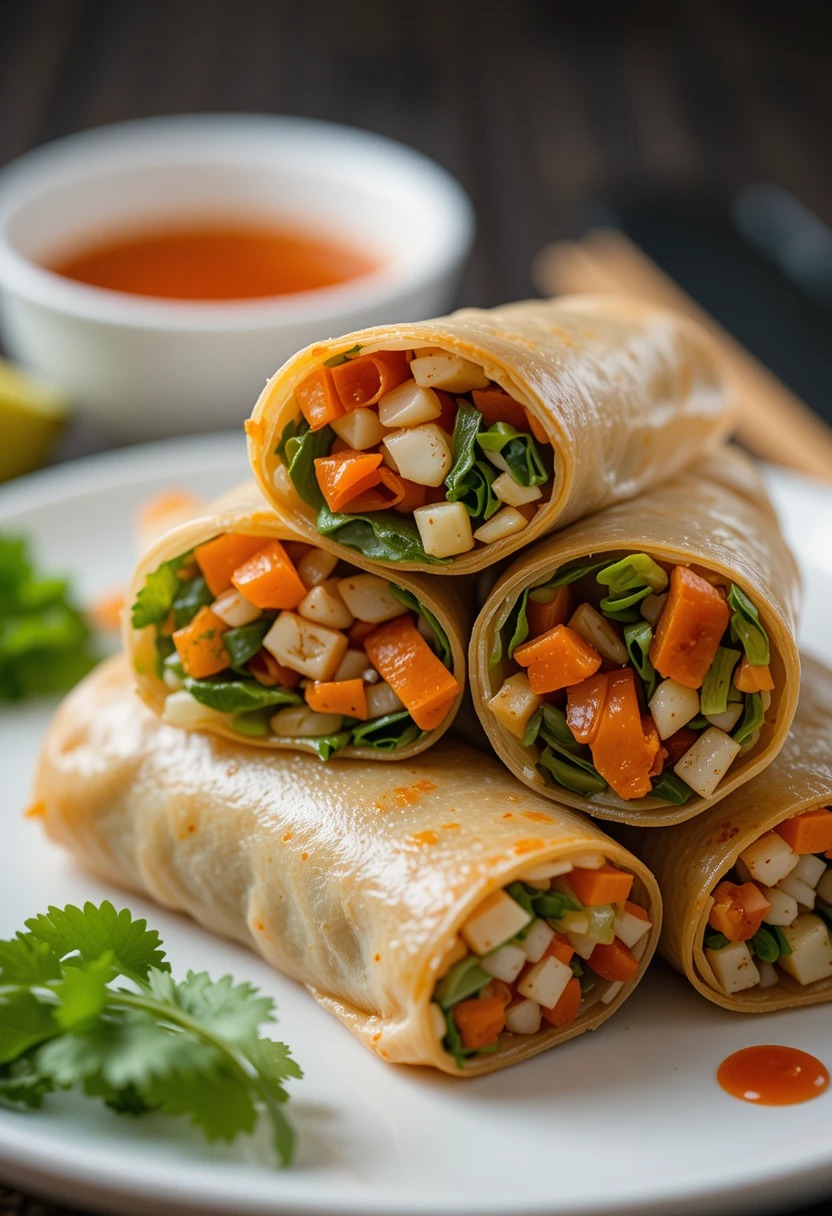
Step 7 : Serve and Enjoy
- Let the spring rolls cool for 5 minutes, then serve with your favorite dipping sauce (like soy sauce, sweet chili sauce, or peanut sauce).
- Tip: Add a sprinkle of sesame seeds or chopped cilantro on top for extra flavor and a pretty look.
Assembly : How to Build Your Spring Rolls
Now comes the fun part—rolling your spring rolls! Here’s how to do it like a pro:
- Lay Out the Wrapper: Place a softened spring roll wrapper flat on your work surface, with one corner pointing toward you (like a diamond shape).
- Add the Filling: Spoon about 2 tablespoons of the veggie filling onto the lower third of the wrapper, leaving a little space around the edges.
- Fold the Bottom: Fold the bottom corner over the filling, tucking it in tightly.
- Fold the Sides: Fold the left and right corners toward the center, like you’re wrapping a present.
- Roll It Up: Roll the wrapper upward, keeping it snug, until you reach the top corner. Press gently to seal.
- Repeat: Do this for all your wrappers until the filling is used up.
Presentation Tips :
- Arrange the spring rolls on a platter in a circular pattern for a fancy look.
- Serve with dipping sauces in small bowls on the side.
- Garnish with fresh herbs or a sprinkle of sesame seeds to make them look extra special.
Storage and Make-Ahead Tips : Keep Your Spring Rolls Fresh
Want to enjoy your spring rolls later? Here’s how to store and reheat them:
- Storing Unbaked Spring Rolls : If you want to make them ahead, assemble the rolls but don’t bake them. Place them in an airtight container, with parchment paper between layers to prevent sticking, and store in the fridge for up to 24 hours.
- Storing Baked Spring Rolls : Let baked rolls cool completely, then store in an airtight container in the fridge for up to 3 days.
- Freezing : Freeze unbaked rolls on a baking sheet until solid, then transfer to a freezer bag. They’ll keep for up to 1 month. Bake straight from frozen, adding 5 extra minutes to the baking time.
- Reheating: Reheat baked rolls in the oven at 350°F (175°C) for 10 minutes to bring back their crispiness. Avoid microwaving, as it can make them soggy.
Recipe Variations : Get Creative!
This recipe is super versatile—here are some fun ways to mix it up:
- Spicy Spring Rolls : Add a teaspoon of chili sauce or chopped jalapeños to the filling for a kick.
- Cheesy Spring Rolls : Sprinkle a little shredded cheese inside before rolling for a gooey surprise.
- Fresh Spring Rolls : Skip the baking and use rice paper wrappers for a fresh, no-cook version. Serve with a peanut dipping sauce.
- Protein-Packed Rolls : Add shredded tofu, cooked shrimp, or chicken to the filling for a heartier meal.
- Sweet Spring Rolls : For a dessert twist, fill with sliced bananas and chocolate chips, then bake and dust with powdered sugar.
Conclusion :
There you have it—7 easy steps to perfect vegetable spring rolls! This recipe is not only quick and healthy but also so much fun to make. Whether you’re cooking for yourself, your family, or a party, these crispy, veggie-packed rolls are sure to be a hit. Don’t be afraid to experiment—try new fillings, sauces, or even shapes (mini rolls, anyone?).
So, grab your ingredients, roll